These Christmas Oreos dipped in Belgian Chocolate are adorable! Everyone will fall in love with all the whimsical details of these cookies!

These Christmas Oreos are so much fun to make over the holidays! They are bright and colorful and will add Christmas cheer wherever you take them! You can even have the kids leave these cookies for Santa on Christmas Eve! Have fun packaging these cookies with more festive cookies like my Gingerbread Reindeer Cookies or these Christmas Oreo Balls !
Jump to:
Why You'll Love This Recipe
These cookies are:
- Easy to make with just a few simple ingredients!
- They are delicious! How can you go wrong with Belgian chocolate and Oreos?
- So much fun to make with kids.
- Are perfect for gifting! Everyone will fall in love especially with Santa and Mrs. Claus!

Ingredient Notes
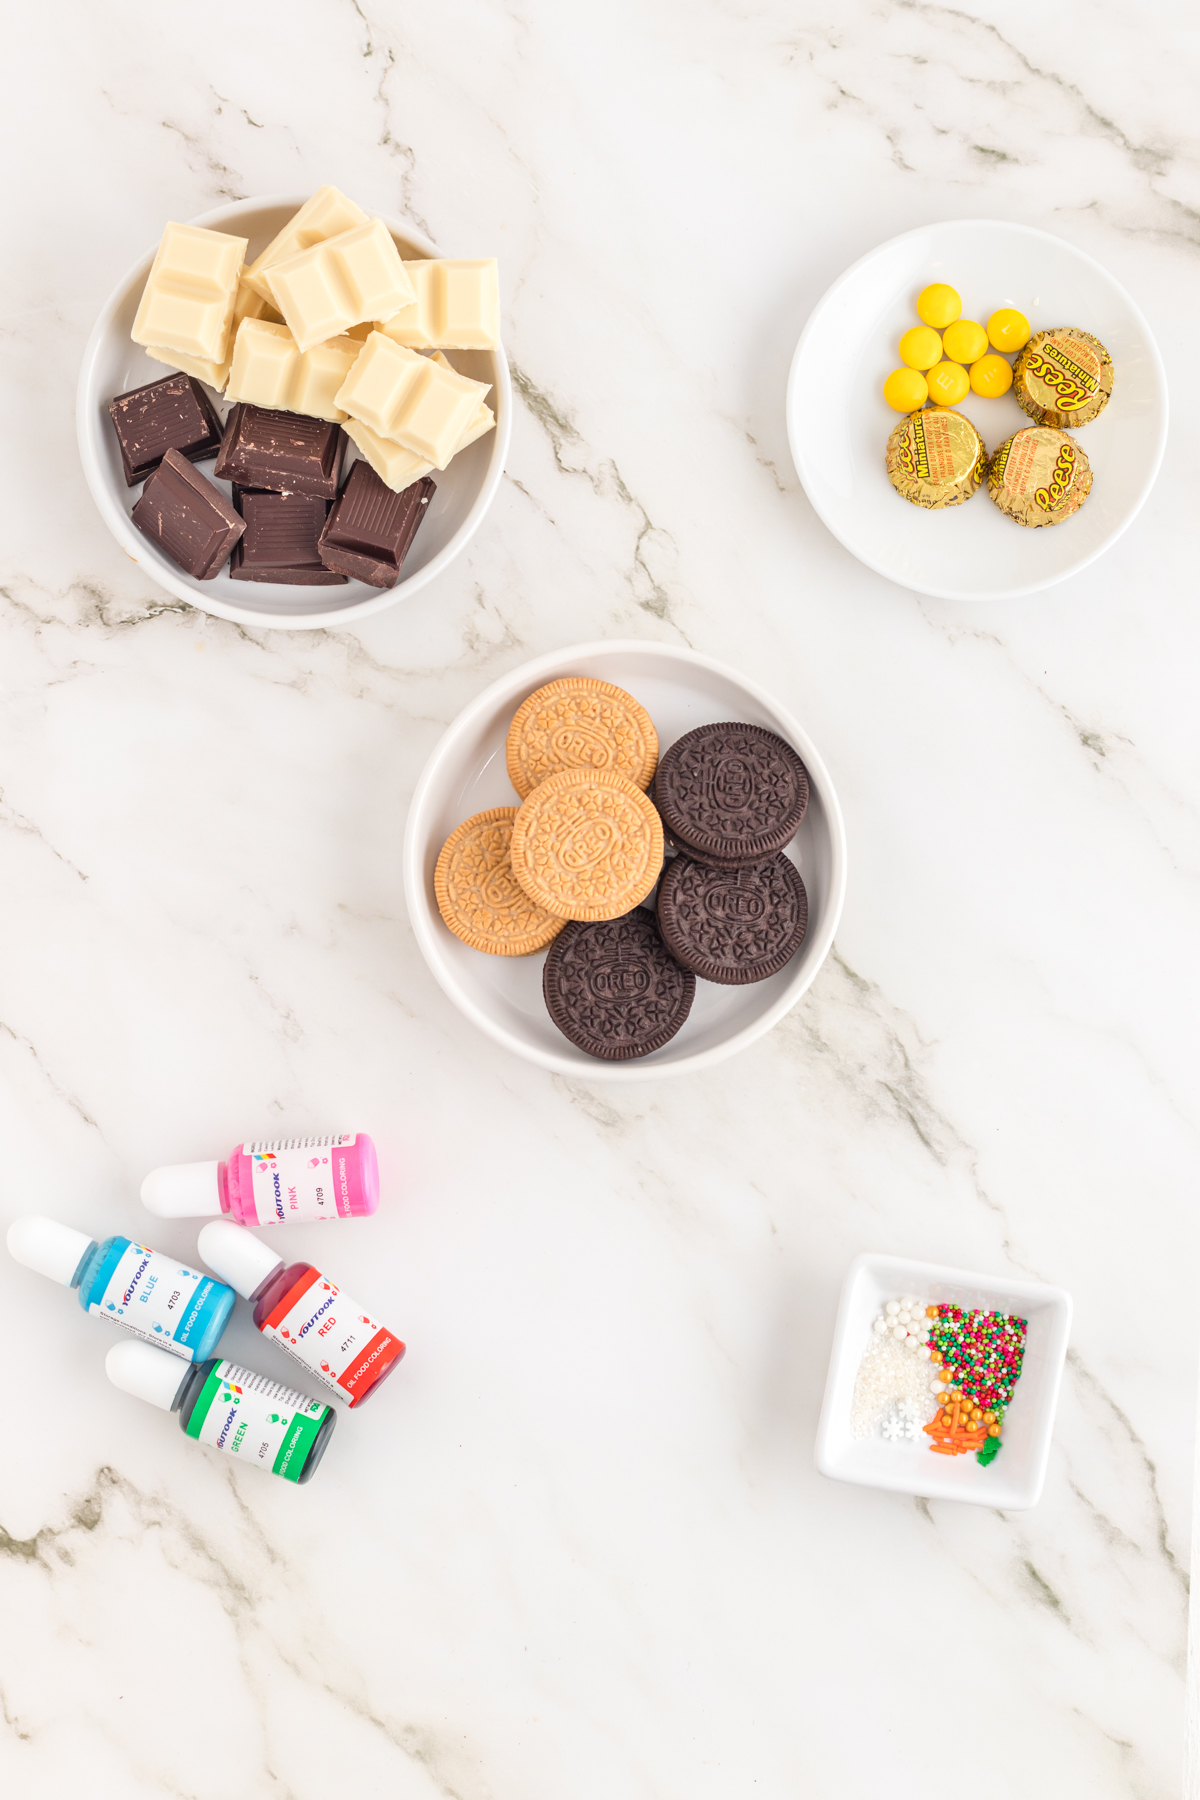
- Oreos - I like to use Cinnamon Bun Oreos you can also use Golden Oreos. I just like the idea of Mr. and Mrs. Claus being cinnamon flavored!
- White and Dark Belgian Chocolate - chocolate covered Oreos made with Belgian chocolate are my favorite! They are more elevated flavor than candy melts in my opinion. However candy melts are a great substitution when you are short on time and don't want to spend time custom coloring your chocolate.
- Candy Color - I love using candy color with white chocolate as it allows me to create a unique color palette for my desserts. It's important to use oil based color for chocolate for best results.
- Assorted sprinkles - sprinkles really help to make these cookies come to life! White sanding sugar adds dreamy touches to Mrs. Claus' hair and Santa's hat and pom pom.
- M&M's - this recipe only really requires 4 M&M's but they are for two very cute details... Mrs. Claus' bun and Santa's pom pom on his hat. I used yellow ones as they were the lightest colors in the package so they could be fully covered in the white chocolate.
- Reese's Mini Peanut Butter Cups - these mini buttercups are cut in half to form the base of the snow globe cookie. This detail is really nice if you actually want to stand your cookie up. This would be so much fun for holiday place settings!
How to Make Christmas Oreos
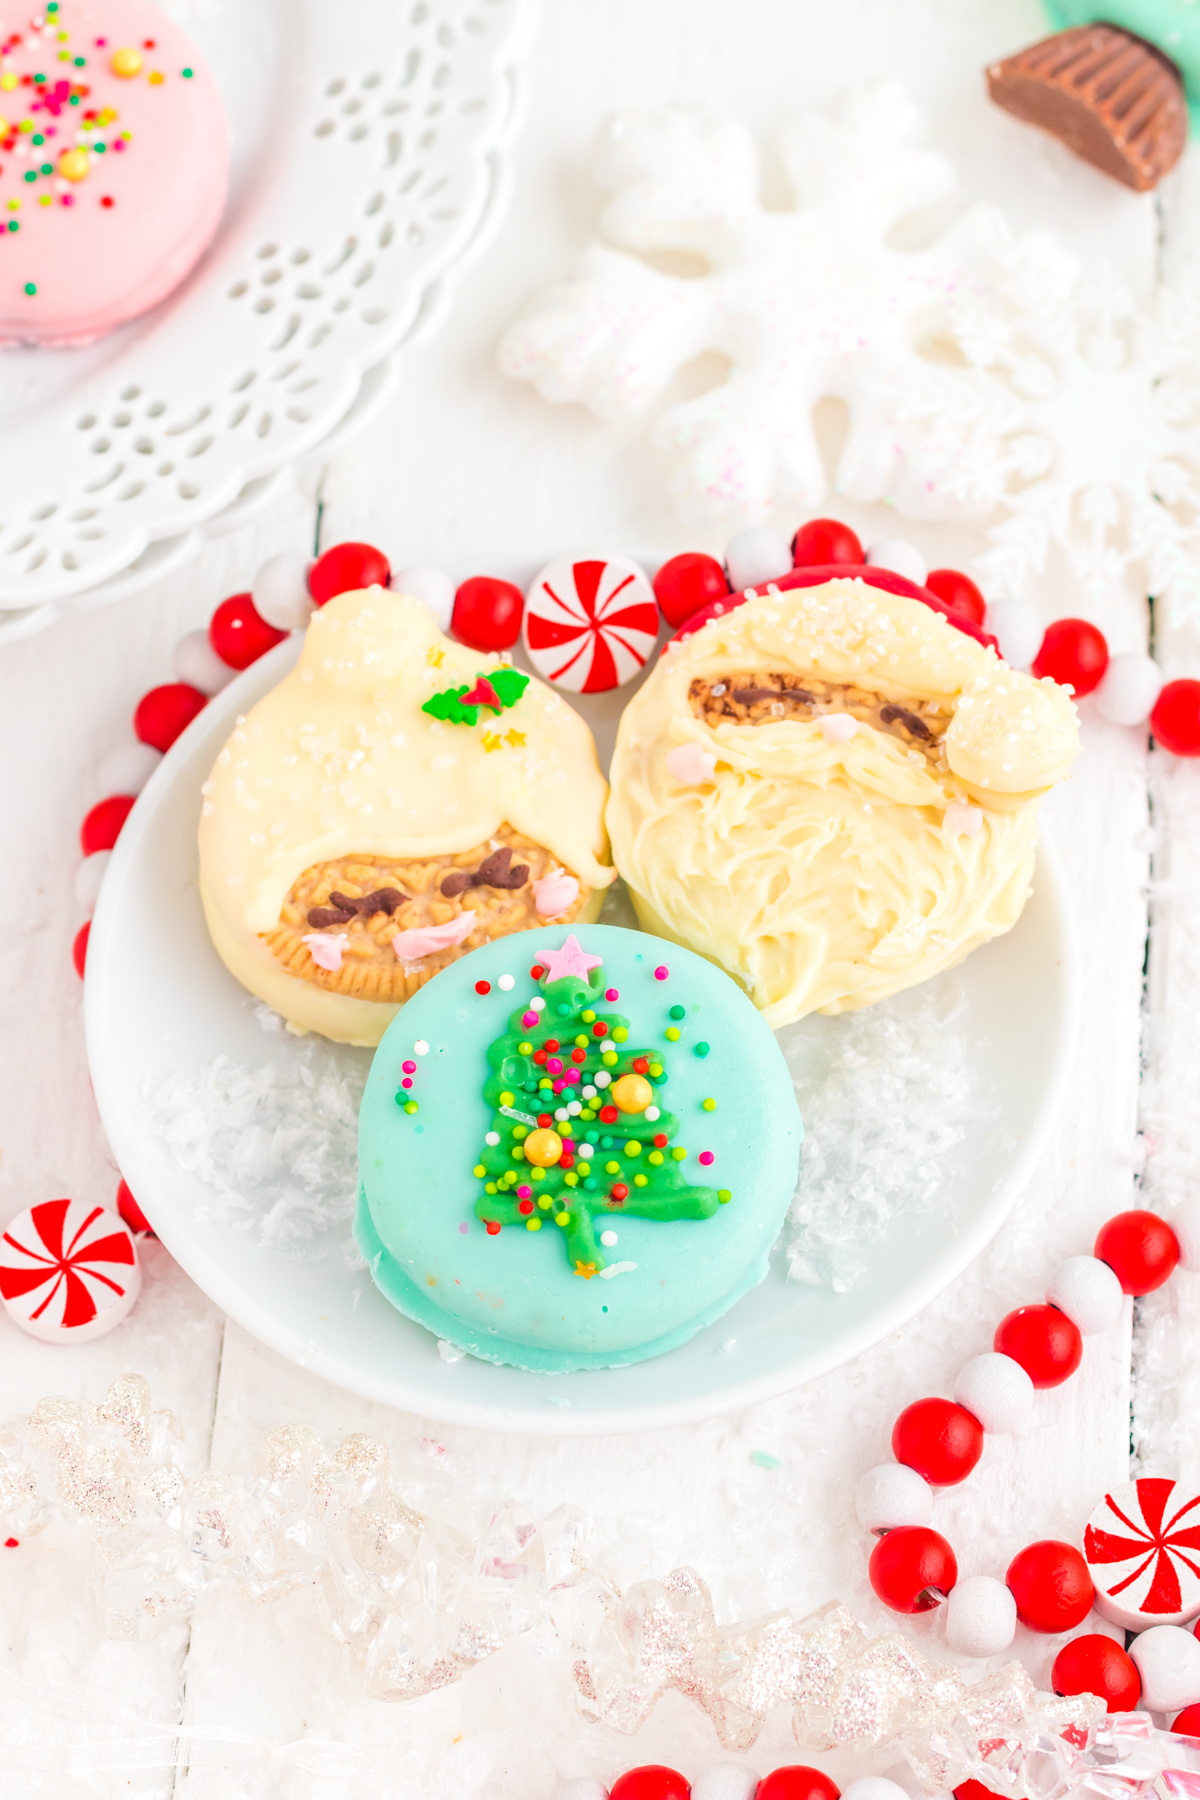
Mrs. Claus Oreo- Step by Step:

- Outline her hair and add her bun (M&M).
- Dip the Oreo in white chocolate being careful not to cover her face.
- Add sanding sugar and sprinkles to her hair and paint on holly berries with red chocolate.
- Pipe eyes with dark chocolate.
- Finish by piping mouth and cheeks with pink chocolate.
- Allow to set.
Santa Oreo - Step by Step:

- Pipe eyes and then an outline as the brim of Santa's hat and the top of his mustache.
- Dip Santa Oreo.
- Add sanding sugar to the brim of Santa's hat and the pom pom. Using a fork, add texture to his beard.
- Dip the back of Santa's head in red chocolate.
- Allow to set.
Ornament Oreo - Step by Step:

- Dip Oreo.
- Allow excess chocolate to drip back into the bowl.
- Add sprinkles.
- Finish by adding metallic sprinkles on the top of the ornament.
- Allow to set.
Christmas Tree Oreo - Step by Step:

- Dip Oreo.
- Allow excess chocolate to drip back into the bowl.
- Pipe a Christmas tree with green chocolate in a zig-zag pattern.
- Add sprinkles and a star on the top of the tree.
- Allow to set.
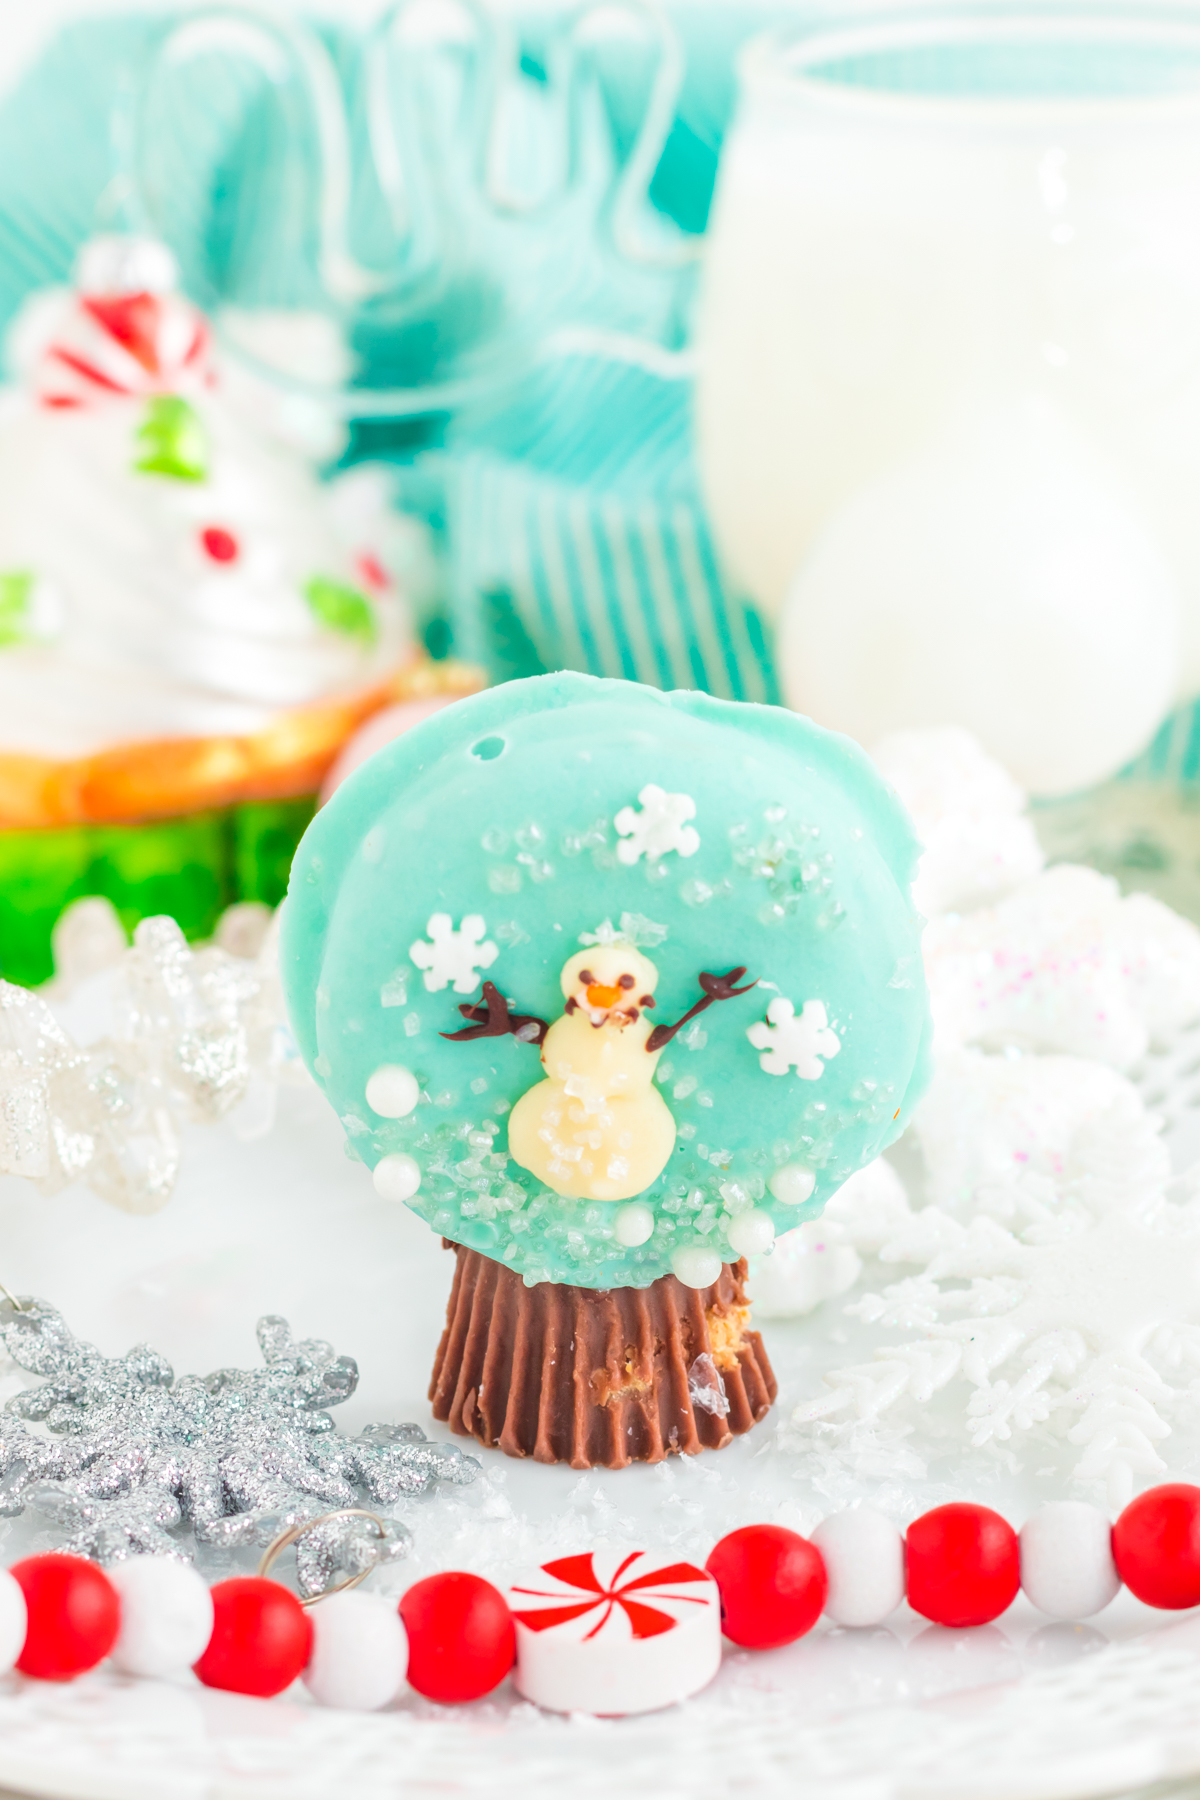
Snow Globe Oreo - Step by Step:

- Dip Oreo in blue chocolate and then add sanding sugar and pearl sprinkles.
- Pipe Snowman.
- Add face and arms.
- Pipe chocolate onto the peanut butter cup to form snow globe base.
- Attach base and allow to set.
Frequently Asked Questions
Chocolate covered Oreos will last for 2-3 weeks in an airtight container. Try to keep the Oreos in a cool dry place.If they are left somewhere warm they can melt and ruin your designs. They can be kept up to 6 months in the freezer if absolutely necessary.
You can choose to refrigerate chocolate covered Oreos if you would like. They will be fine in an airtight container in a cool dry area on the kitchen counter. If you are using Belgian chocolate to dip the Oreos and lots of design work, I recommend that they not be refrigerated to prevent changes in the color of the chocolate. Humidity can also cause the chocolate to sweat and the designs can run potentially ruining your creations.
Drizzling Oreos is very simple. If you are not fussy about how perfect they will look, you can just dip a fork in the chocolate and drizzle the chocolate from side to side over the Oreo. If you want to be more precise with your drizzle use a piping bag with a very fine tip attached or cut the tiniest slit in the bag so you can control the amount of chocolate that you pipe over the Oreos. Be sure to have wax or parchment paper under your Oreos for easy clean up!
Expert Tips
- Be careful not to overheat your chocolate to avoid burns and scorching.
- Substitute colored candy melts for the Belgian chocolate if you wish.
- You can double the recipe to make more chocolate dipped Oreos if you like.
- Keep piping bags warm on a plate over a bowl of hot water.
- Use only oil-based candy coloring for chocolate it will provide the most vibrant results.
- Avoid storing these Christmas Oreos in the refrigerator as they will sweat and the designs can run. These cookies can last in an airtight container for up to 2 weeks.
- Make this recipe with kids and have them add the sprinkles and details.
You May also like...
If you love Holiday treats check out my Christmas Crack and Pie Crust Cookies!

Recipe

Christmas Oreos
Equipment
- Piping bags for piping fine details.
- Parchment or wax paper for placing cookies to set after dipping.
- Small deep microwave safe bowls for melting chocolate
- Offset spatula for releasing cookies from parchment lined surface.
- Toothpicks for fine details or cleaning up mistakes with the chocolate.
Ingredients
- 4 Cinnamon Bun or Golden Oreo Cookies
- 6 Oreo Cookies
- candy coloring must be oil based for coloring chocolate.
- ¼ cup Belgian dark chocolate (measure before melting)
- ¾ cup Belgian white chocolate (measure before melting) for Santa and Mrs. Claus.
- ¾ cup Belgian white chocolate (measure before melting) tinted blue for the Christmas Tree Oreo and the Snow Globe Oreo.
- ½ cup Belgian white chocolate (measure before melting) tinted pink for the Ornament Oreo.
- ¼ cup Belgian white chocolate (measure before melting) tinted green for the Christmas Tree Oreo.
- ¼ cup Belgian white chocolate (measure before melting) tinted red for Santa's hat and Mrs. Claus' holly berries.
- 4 M & M's candies for Santa's pom pom and Mrs. Claus' bun.
- assorted sprinkles
- white sanding sugar
- 1 Reese's Peanut Butter Cup mini sized cut in half for the base of the Snow Globe Oreo.
Instructions
- Start by melting chocolate as per the ingredient list above in small deep microwave-safe bowls in the microwave in 20-second increments. Once your chocolates are all melted and tinted with candy color you can begin decorating and reheat chocolate as needed.
Mrs. Claus Oreo
- To make Mrs. Claus, add 1 tablespoon of white chocolate to a piping bag and start by outlining her hair. Add a dot of white chocolate at the top of the Oreo and add an M&M for her bun.
- Chill the cookie in the freezer for a few minutes until the chocolate outline is set.
- While the chocolate is setting add 1 tablespoon of the dark chocolate to a piping bag, add 1 tablespoon of the pink chocolate to another piping bag, add 1 tablespoon of the green chocolate to another piping bag, and reserve for the next steps.
- Using a fork, dip Mrs. Claus in white chocolate being careful to only cover Mrs. Claus’ bun, hair, and the back side of the cookie. Allow excess chocolate to drip back into the bowl
- Lay the cookie on a parchment-lined plate. Sprinkle Mrs. Claus' hair with white sanding sugar.
- Add leaf sprinkles to Mrs. Claus’ bun and dip a toothpick in the red chocolate to make holly berries
- Pipe eyes for Mrs. Claus using the dark chocolate.
- Next pipe a mouth and cheeks using the pink chocolate.Allow to set.
Santa Oreo
- To make Santa, start by piping eyes at the top third of the cookie with dark chocolate.
- Next outline around Santa’s eyes and the furry part of his hat. Add an M&M to make a pom pom on his hat.
- Chill the cookie in the freezer for a few minutes until the chocolate outline is set.
- Using a fork, dip Santa in white chocolate being careful to not cover his eyes. Allow excess chocolate to drip back into the bowl.
- Lay the cookie on a parchment-lined plate. Sprinkle Santa's beard and the brim of his hat and pom pom with white sanding sugar.Use a fork to create some texture on his beard after the chocolate has set a bit.Pipe a mustache for Santa with some white chocolate.
- Next pipe a nose and cheeks using the pink chocolate.
- When Santa has fully set, finish his hat by carefully dipping just the top of his head in the red chocolate.Allow to set.
Ornament Oreo
- To make the Ornament , start by dipping the Oreo in the pink chocolate. Allow excess chocolate to drip back into the bowl.
- Garnish with desired sprinkles.
- Chill the cookie in the freezer for a few minutes until the chocolate is set.
- Add the metallic sprinkles to form the ornament top using a bit of melted chocolate.Allow to set.
Christmas Tree
- To make the Christmas Tree, start by dipping the Oreo in the blue chocolate. Allow excess chocolate to drip back into the bowl.
- Chill the cookie in the freezer for a few minutes until the chocolate is set.
- Pipe a zig-zag Christmas tree with the green chocolate.
- Garnish with desired sprinkles. Add a sprinkle star to the top of the tree.Allow to set.
Snow Globe Oreo
- To make the Snow Globe, start by dipping the Oreo in the blue chocolate. Allow excess chocolate to drip back into the bowl.
- Add white sanding sugar to the top and bottom parts of the Oreo. Add snowflakes to the top and white pearl sprinkles to the bottom.
- Chill the cookie in the freezer for a few minutes until the chocolate is set.
- Pipe a snowman to the center of the cookie. Sprinkle white sanding sugar over it.
- Pipe the eyes and mouth with dark chocolate. Next pipe branches for arms.Add an orange Jimmie for the nose.
- Cut a mini Reese Buttercup in half and adhere it to the bottom of the snow globe with dark chocolate to form the base.Allow to set.
Notes
expert tips
- Be careful not to overheat your chocolate to avoid burns and scorching.
- Substitute colored candy melts for the Belgian chocolate if you wish.
- You can double the recipe to make more Oreos if you like.
- Keep piping bags warm on a plate over a bowl of hot water.
- Use only oil-based candy coloring for chocolate it will provide the most vibrant results.
- Avoid storing these Oreos in the refrigerator as they will sweat and the designs can run. These cookies can last in an airtight container for up to 2 weeks.
- Make this recipe with kids and have them add the sprinkles and details.



Susan says
Wow! These chocolate covered Christmas oreos are ADORABLE! The design looks so complex at first but I love the way the blog post breaks it down - surprisingly very easy, yet impressive! Can't wait to make these this holiday season!
I am curious, do you have a favorite brand of chocolate you recommend using?
Charlotte Singh-Dhanraj says
Thank you so much Susan!I use Waterbridge Belgian chocolate bars as I'm in Canada. I have also used Lindt gold bars which may be more available in grocery stores. You can use any good quality chocolate bars that you like. I hope you love making and enjoying these Christmas Oreos for the holidays.
Melody says
Oh my goodness these are absolutely adorable!!! I can’t wait to make them for my kids 😍😍😍
Charlotte Singh-Dhanraj says
Aww! Thank you so much Melody! I hope you all love them!
Braghan says
These are absolutely adorable! I can't wait to add these cookies to my cookie tins this year! They'll make it look so special!