
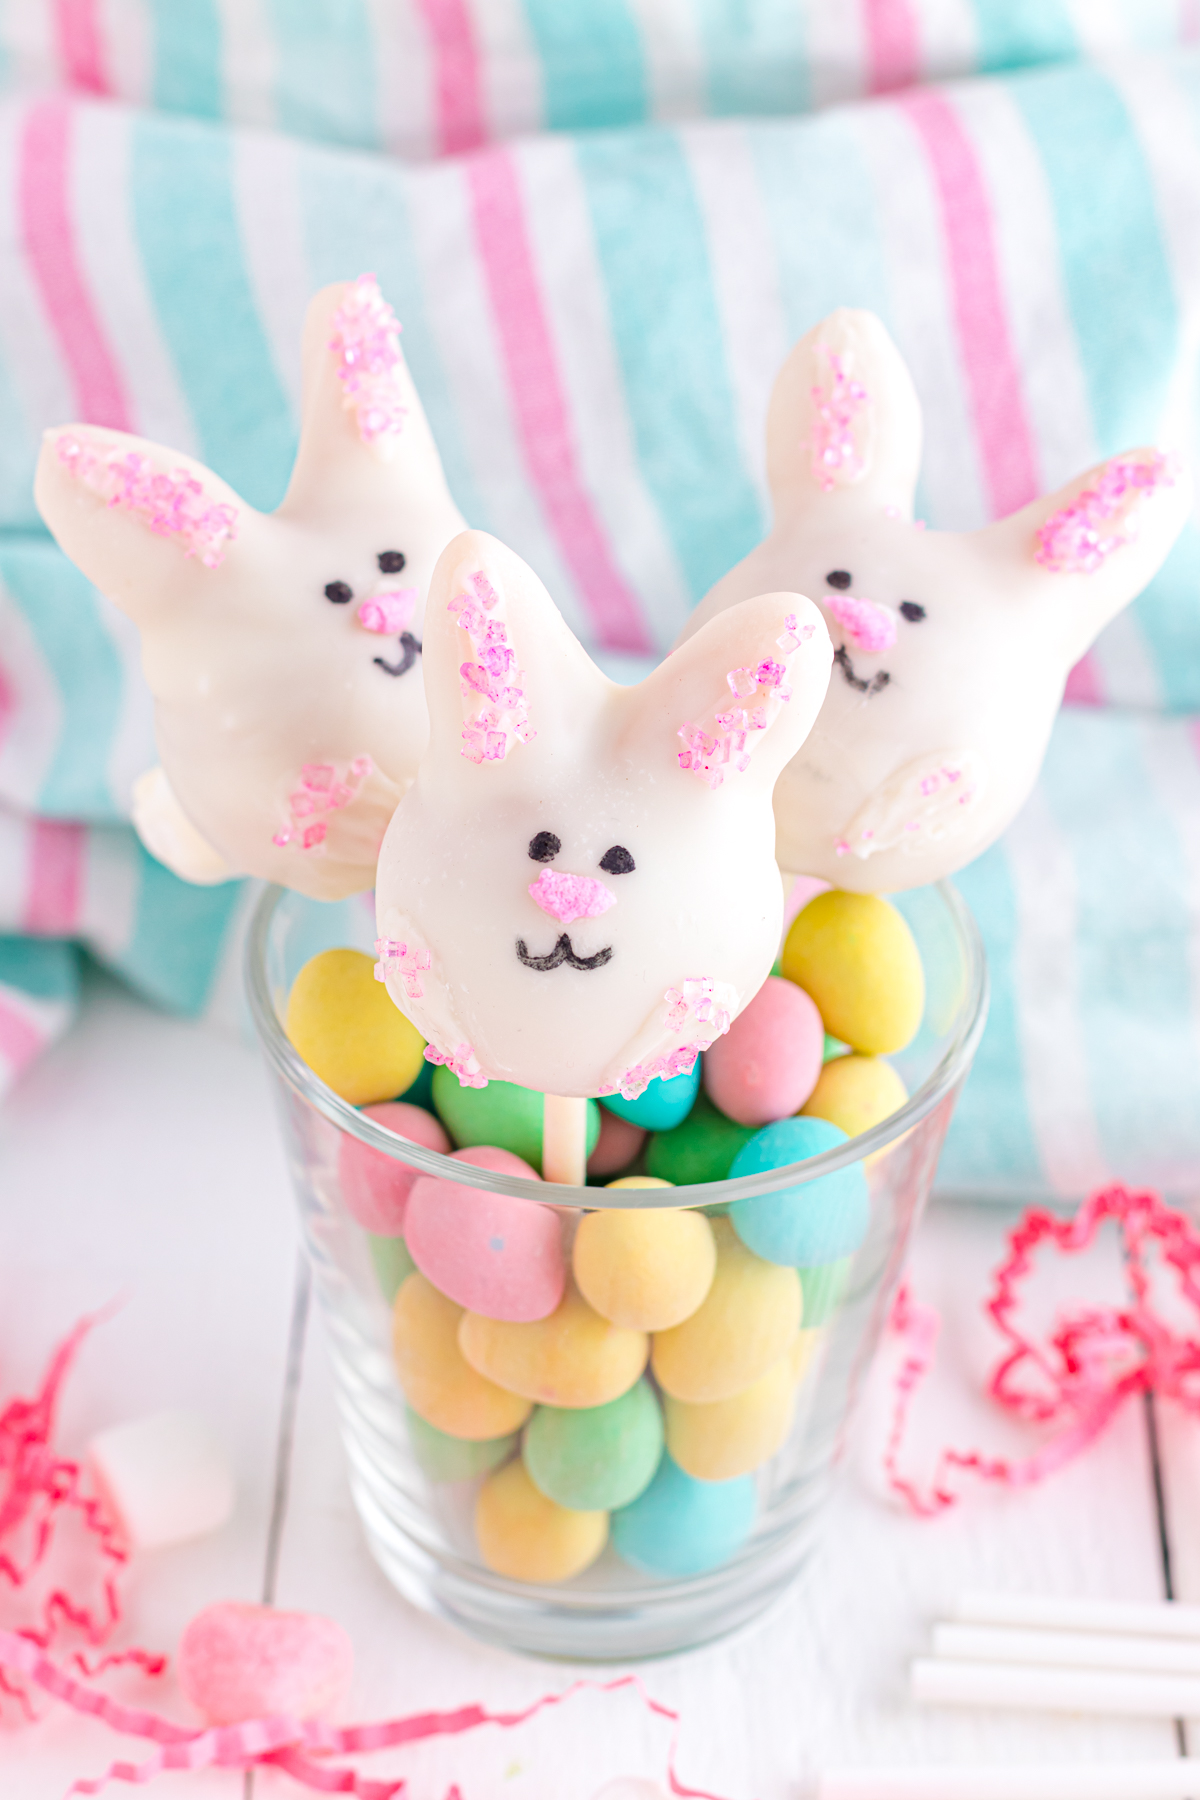
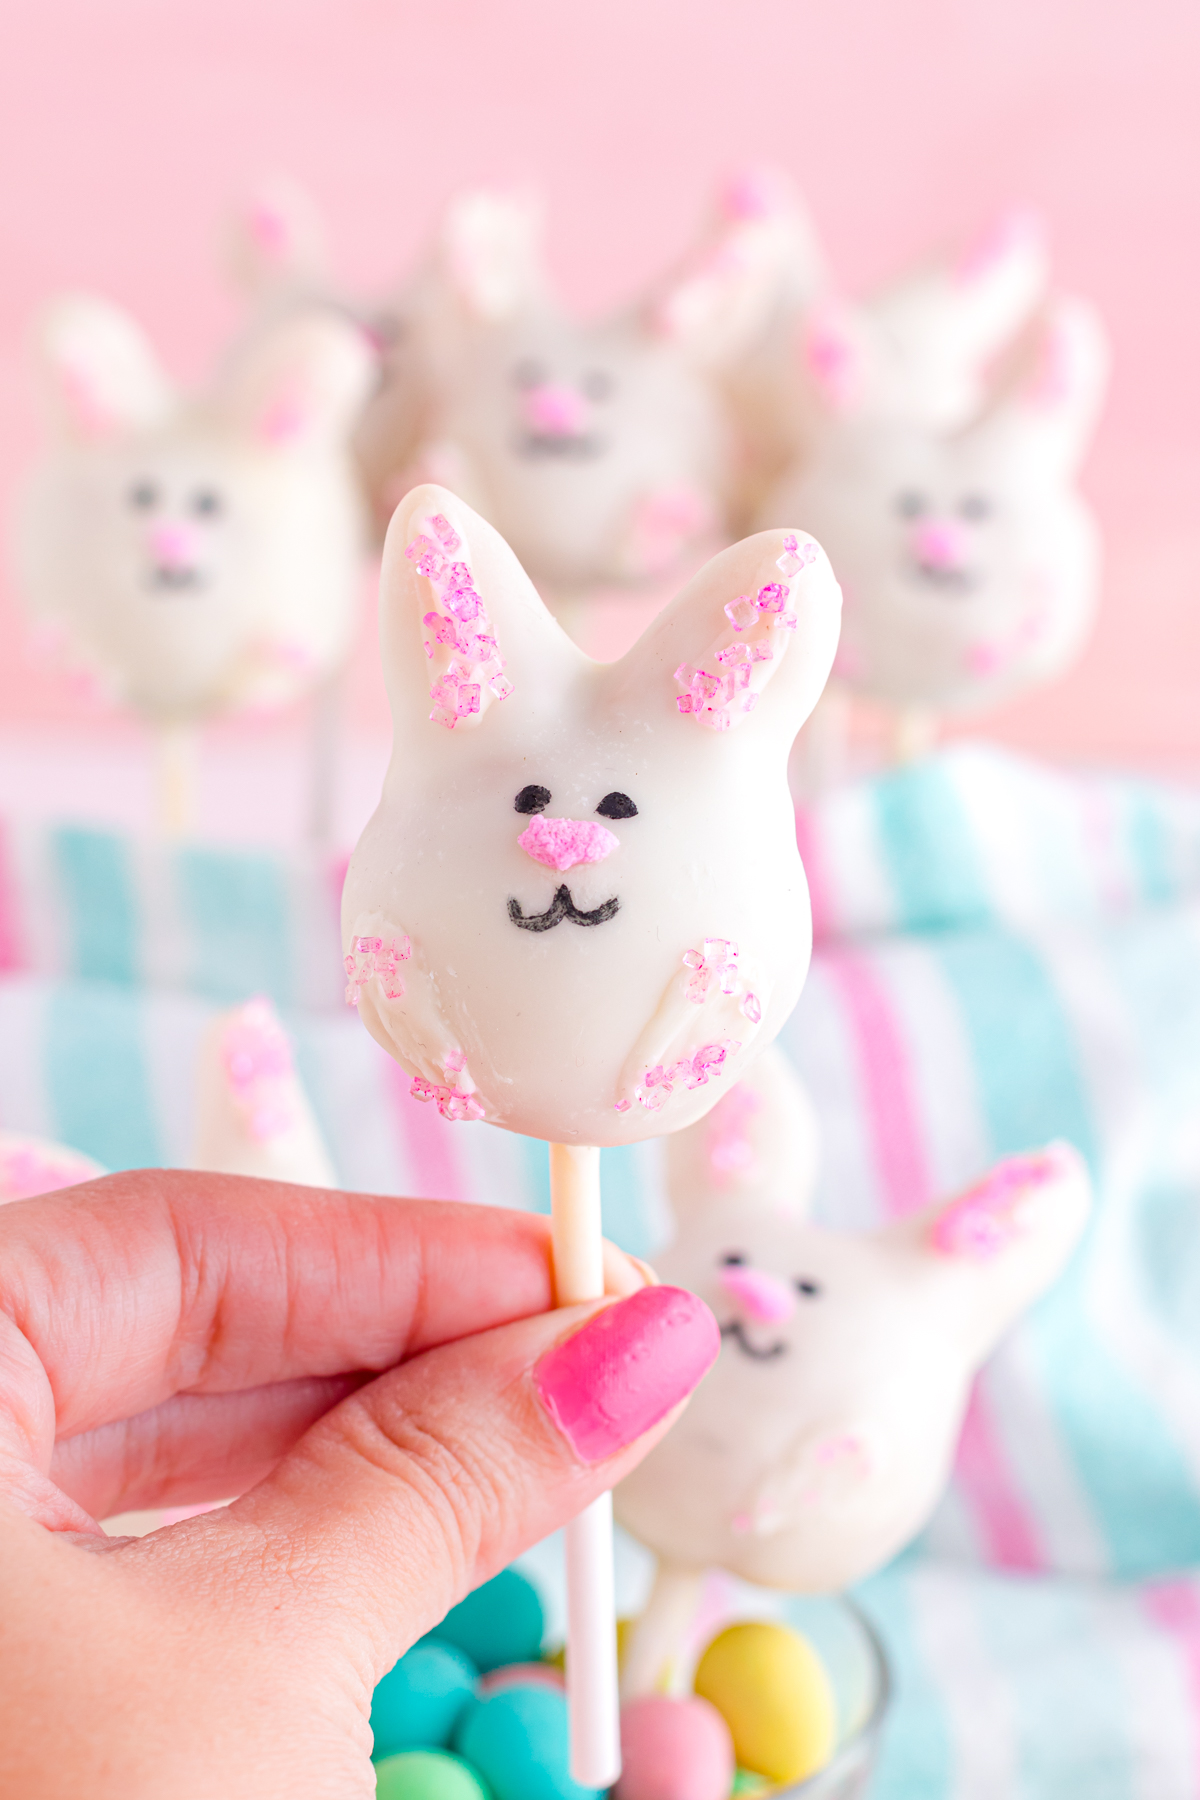
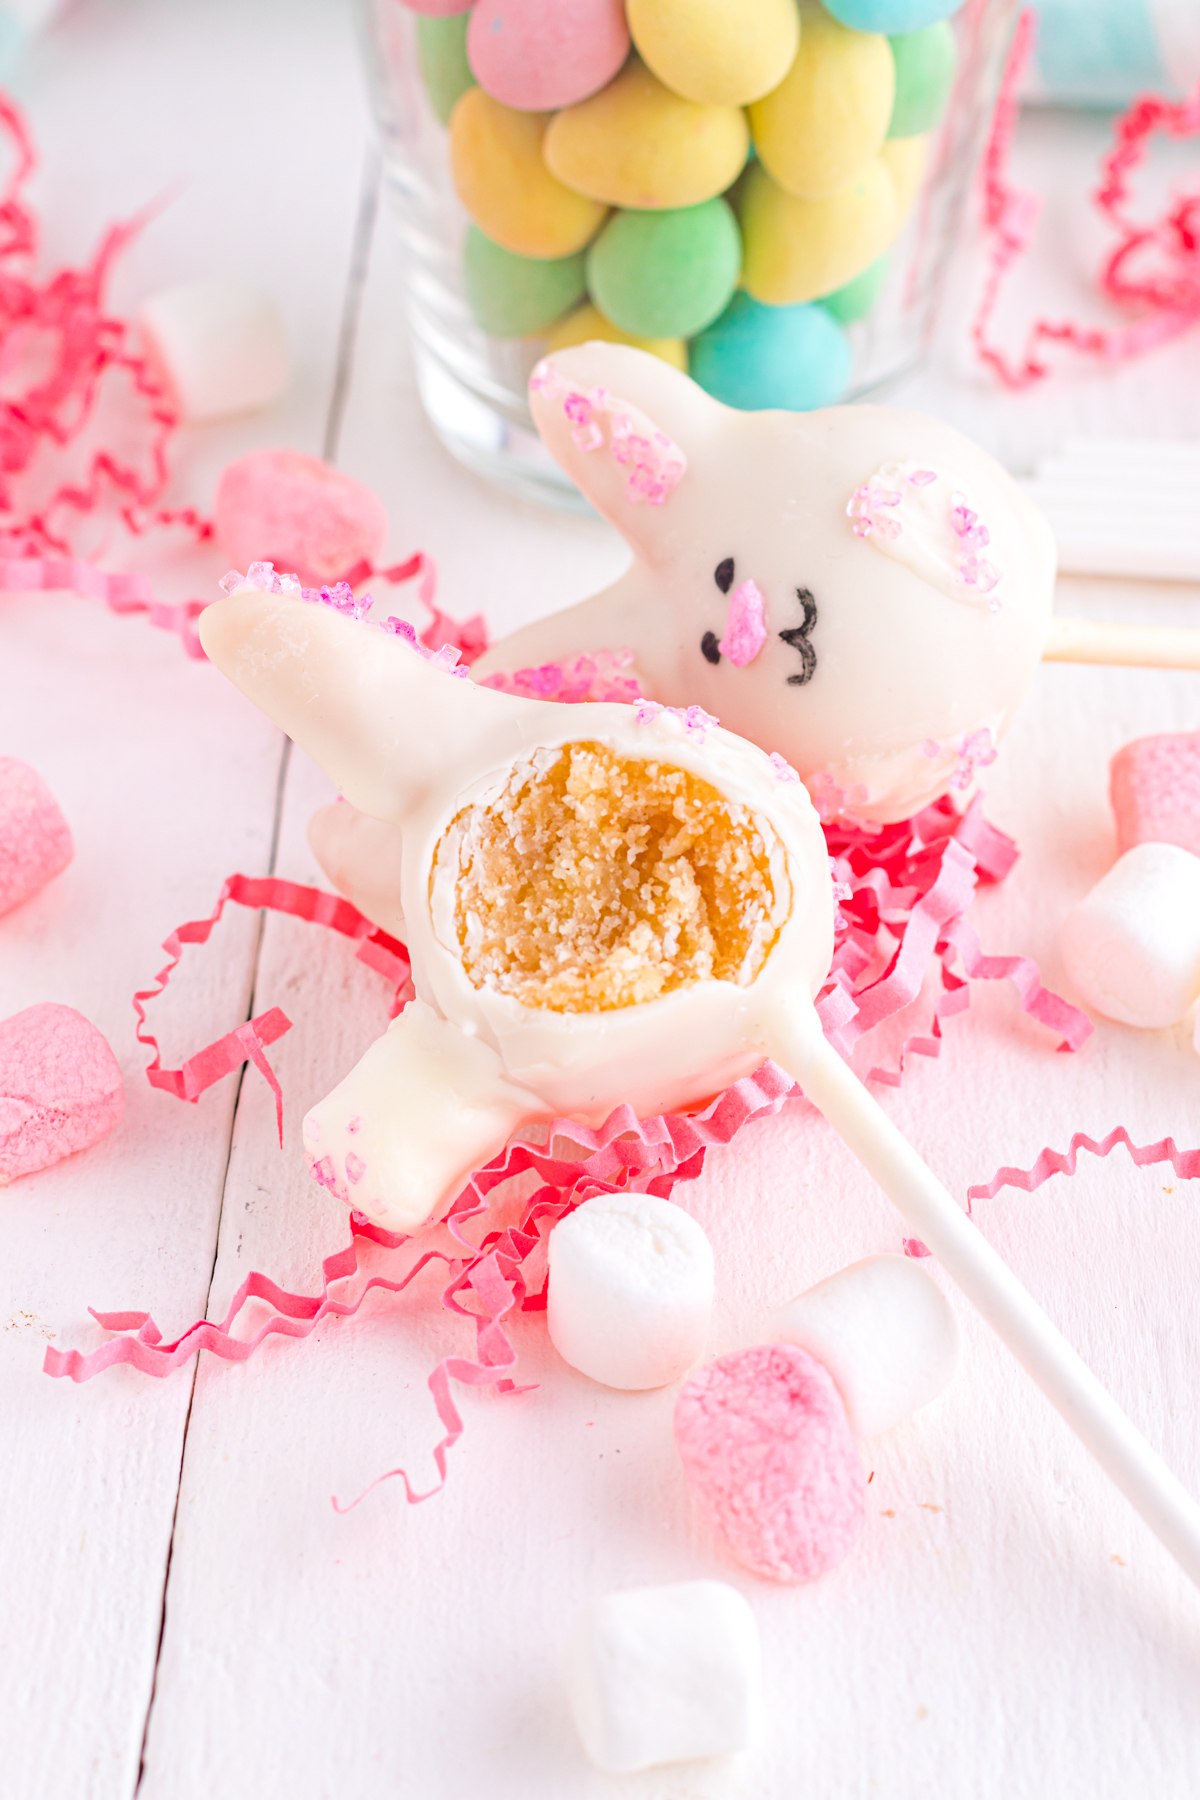
These Bunny Cake Pops are adorable Easter treats! Homemade vanilla cake mixed with cream cheese frosting and dipped in white chocolate!

Although these bunny cake pops may look complicated, they couldn't be easier and so much fun to make with the kids! The vanilla cake is homemade but a storebought frosting is an easy shortcut so you can get to decorating! My boys love making these but eating them even more!
Jump to:
Why You'll Love These Adorable Easter Bunny Cake Pops
These Easter Cake Pops are :
- Homemade with just a few simple ingredients but feel free to use a cake mix if you prefer.
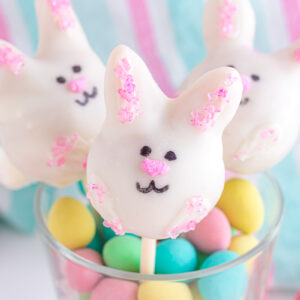
- Adorable and perfect for decorating your Easter sweet tables or for packaging in Easter baskets with Easter eggs.
- An easy to make and decorate Easter recipe for kids!
Ingredient Notes
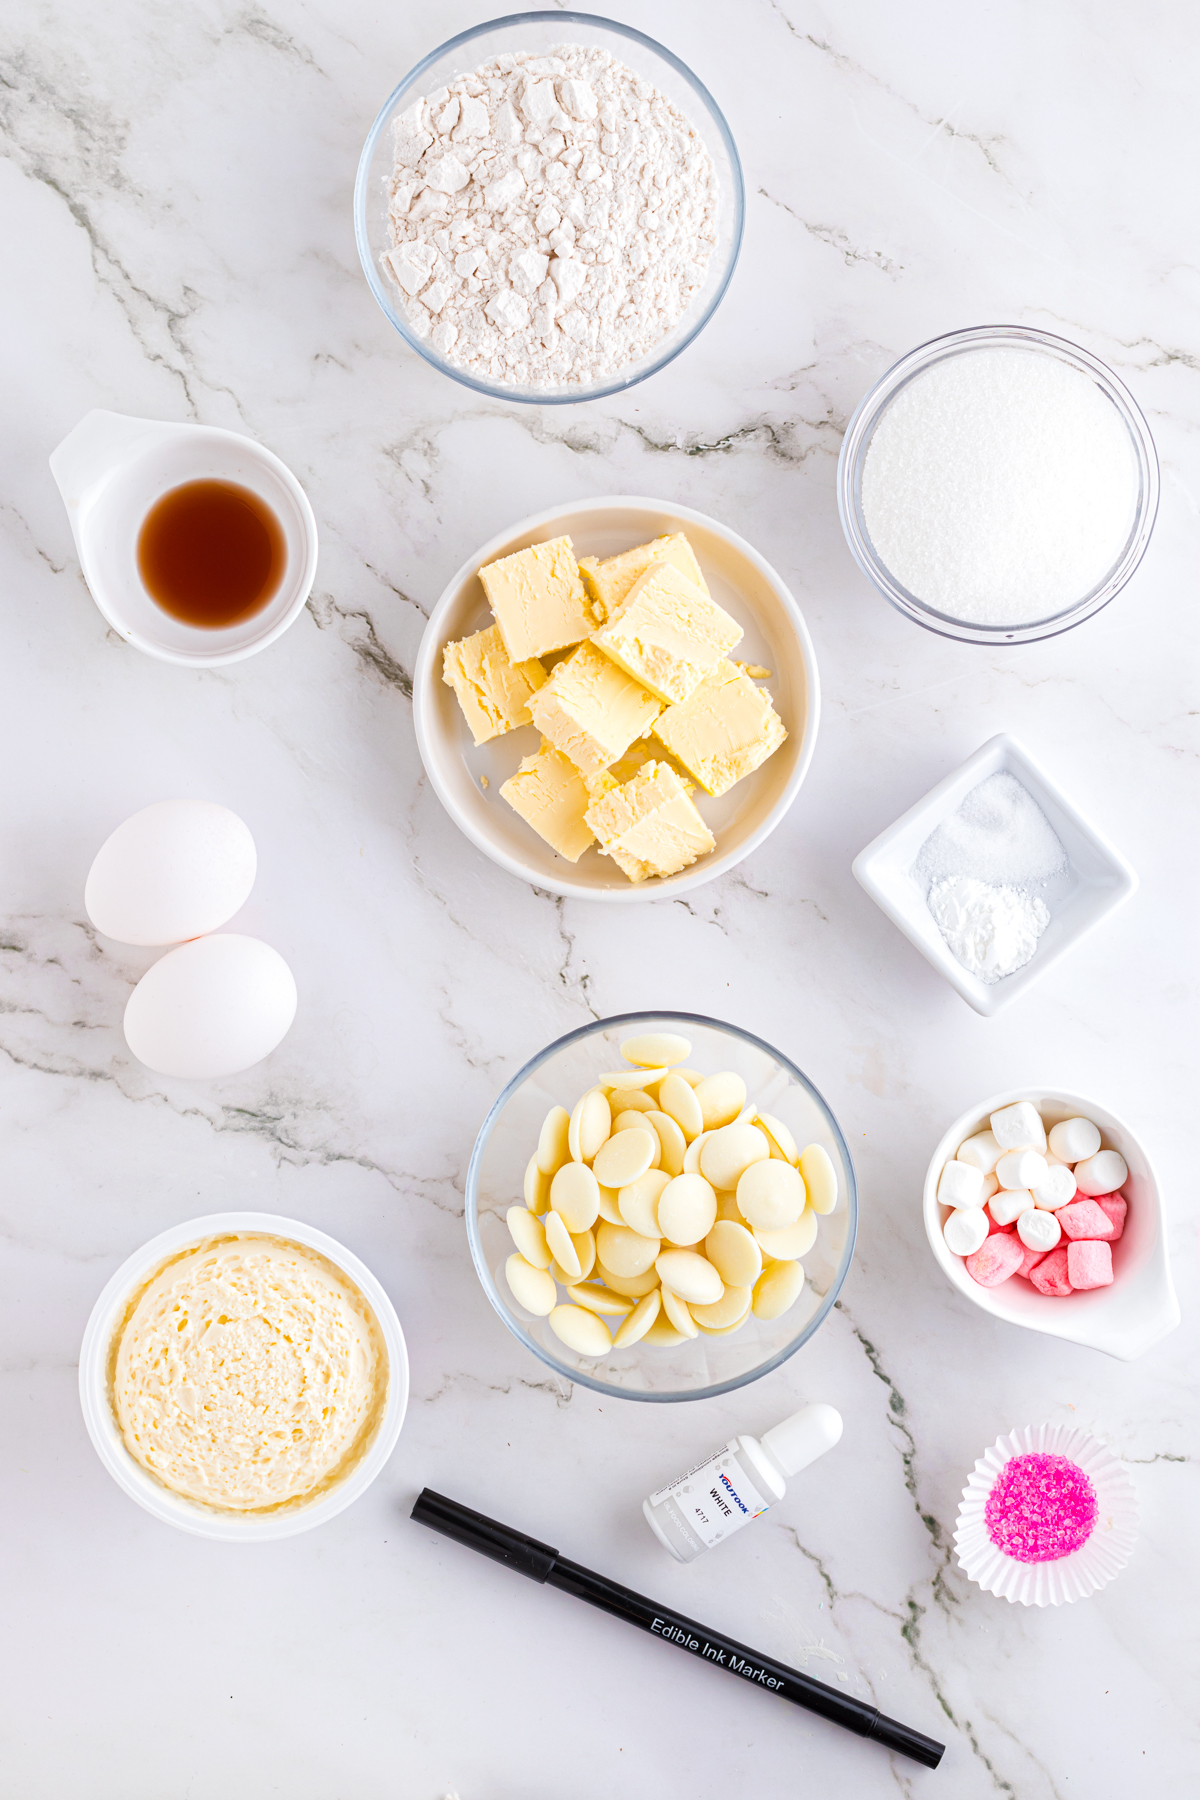
- Unsalted Butter- you can use salted butter if you like but then omit the salt in the recipe. I prefer unsalted butter so that you can control the amount and flavor.
- Granulated Sugar- ensure that the sugar is properlly creamed with the butter for the best cake texture.
- Eggs- use large eggs.
- Vanilla Extract
- All Purpose Flour
- Baking Powder
- Salt
- Whipped Cream Cheese Frosting - I like this frosting but feel free to use a homemade recipe if you have time!
- 14 ounces of white candy melts- I don't find that chocolate chips set up the same way so I highly recommend using melted candy melts for this recipe.
- Pink Sanding Sugar
- Pink and White Mini Marshmallows- you only need 1 pink mini marshmallow. I just think the texture for the noses is so cute when you use marshmallows! If you don't want to use marshmallows you can use melted pink candy melts to pipe or draw noses with a cocktail stick. The white marshmallows are for the cute bunny tails.
- Black Edible Food Marker
- Large Bowl - to mix cake crumbs and frosting.
- Kitchen Shears- these are ideal for cutting the marshmallow nose but just use a small sharp knife if you don't have shears.
- Lollipop Sticks
- Foam Block for cake pops to set- you will need something sturdy to stand your pops to set after all of the hard work you put in decorating. Florist foam or styrofoam works great, you can also punch holes in a cardboard box.
How to Make Bunny Cake Pops

- 1 - Crumble Cake.
- 2 - Add cream cheese.
- 3 - Scoop cake mixture.
- 4 - Form into balls.
- 5 - Make 2 small balls from cake mixture.
- 6 - Shape balls into bunny ears.
- 7 - Attach ears to cake ball.
- 8 - Chill bunny to prepare for dipping.
- 9 - Dip cake pop stick in melted chocolate. Allow excess chocolate to drip back into the cup.
- 10- Insert lollipop stick into pop.
- 11- Fully immerse pop into the candy coating.
- 12 - Allow the coated cake pop to set on foam block..
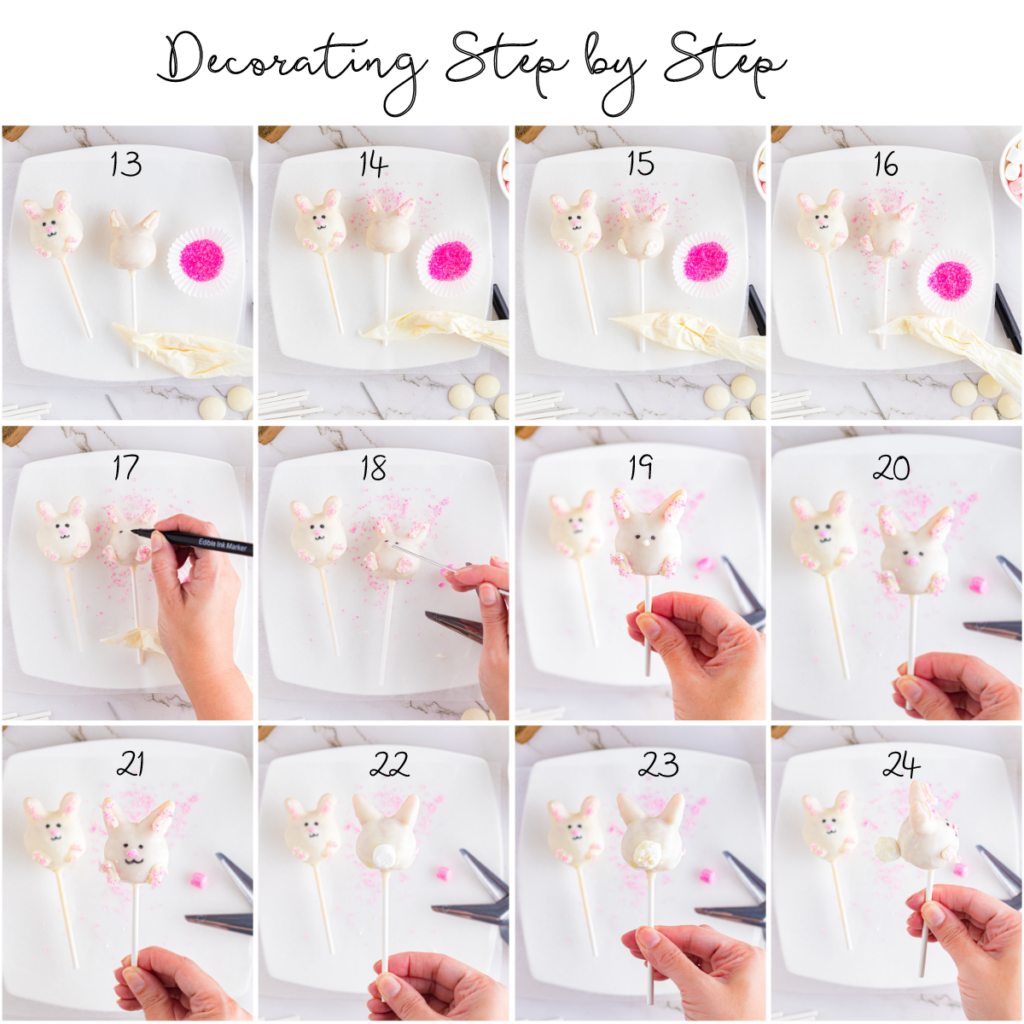
- 13- Add white chocolate to ears as 2 lines.
- 14- Cover lines with sanding sugar.
- 15- Add feet to the bottom of the cake ball with white chocolate.
- 16- Sprinkle feet with sanding sugar.
- 17- Draw eyes with an edible food marker.
- 18- Prepare a cocktail stick to apply chocolate to cake pop.
- 19- Add a dot of white chocolate to the nose area.
- 20- Attach a small piece of pink marshmallow for the nose.
- 21- Draw on mouth with edible food marker.
- 22- Attach a mini marshmallow with white chocolate to the back for the Easter Bunny cake pop tail.
- 23- Cover the marshmallow with white chocolate and add some texture to make it look furry with a cocktail stick.
- 24- Allow cake pops to set and enjoy!

Frequently Asked Questions
Freezing cake pops for about 10-15 minutes should yield ideal results. Do not let them freeze completely as they can crack the chocolate or candy melts once dipped. Using the freezer is also great for quick setting to add more details to cake pops.
Cake pops can last about 1 week wrapped in cellophane in the refrigerator. Make them a day or 2 before your event and they will be perfect. This is preferred over freezing as they could get damaged and cracked if there are intricate designs.
Although you can use any good quality chocolate for coating cake pops, candy melts seem to work best for smoothness and providing a nice crack when biting into the cake pop. They also harden quicker and are a good surface for using edible markers when decorating.
Expert Tips
- The success of your cake balls depends on the cake being evenly crumbled and mixed uniformly with icing. Adjust the mixture with more icing a little at a time if they are too dry. The mixture should hold together easily when formed into a ball.
- Thin candy melts with a little coconut oil if you notice they are lumpy or not smooth after melting.
- Use a deep microwave-safe container to dip pops. A mug or a glass is perfect!
- The edible market will run on the chocolate if it is not fully set. Pops can be set in the freezer for 5 to 10 minutes if desired before drawing the face on the bunny.
- These Easter Cake Pops will stay fresh in the refrigerator for 1 week covered in plastic wrap or 2 days at room temperature.
- Wrap treats in cellophane bags with curling ribbon for gifting or arrange them in cake pop bouquets with Easter egg cake pops for display!
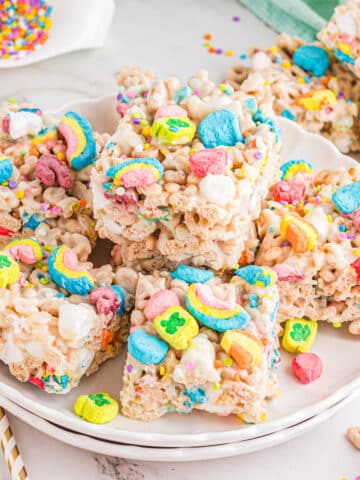
Other fun holiday recipes
Recipe
Bunny Cake Pops
Equipment
- large bowl
- medium cookie scoop
- foam block as a stand for cake pops
- lollipop sticks
- edible food marker black
- kitchen shears
- cocktail stick
Ingredients
- ½ cup unsalted butter room temperature
- ¾ cup granulated sugar
- 2 eggs large
- 2 teaspoons vanilla extract
- 1 cup all purpose flour
- 1 teaspoon baking powder
- ½ teaspoon salt
- ¼ cream cheese frosting
- 14 oz candy melts white
- pink sanding sugar
- 15 mini marshmallows white- for bunny tails
- 1 mini marshmallow pink- for bunny noses
Instructions
Prepare Cake
- Preheat oven to 350 degrees. Add parchment paper to an 8 inch round cake pan and set aside.
- In the base of a stand mixer add the butter and sugar and cream with the paddle attachment at medium speed for 5 minutes until light yellow in color and smooth in texture.
- Switch the mixer to low speed and add the eggs 1 at a time and followed by the vanilla on low speed until combined.
- In a medium bowl whisk together the flour, baking powder, and salt.
- Mix the the dry ingredients into the wet ingredients slowly until just combined on low speed. Next, add the cake batter to the prepared cake pan.
- Bake cake for 25 minutes until golden and a cake tester comes out clean or has a few loose crumbs. Allow the cake to cool for 40 minutes before making the cake pops.
Creating and assembling the Bunny Cake Pops
- Once the cake has cooled you can crumble it either with a food processor or your hands (just be sure that it is uniform in texture) into a large bowl.
- Next, combine the frosting with the cake crumbs. Grab some of the mixture in you hands and shape a ball to ensure it holds it's shape. It should stay together easily with no dry spots.
- Scoop the mixture with a cookie scoop and form into uniform balls with your hands.
- Create bunny ears by shaping 2 small pieces of of the cake mixture and molding each ear with your fingers into the cake pop. Repeat with the second ear. Complete all the cake pops and transfer to the freezer to chill for 15 minutes.
- In a deep mug or glass that is microwave-safe, melt the candy melts in 20-second increments stirring in between heating until smooth.
- Once the cake pops have chilled remove them from the freezer and transfer them to the refrigerator. Remove 1 cake pop at a time to work on, while the others stay chilled in the refrigerator.
- Dip a lollipop stick in the melted candy melts. Insert the stick into the bottom of the bunny pop.
- Next, dip the entire pop into the melted chocolate and ensure that it's fully coated. Allow the excess chocolate to drip back into the container.
- Place the coated cake pop into the foam block and allow to fully set. Continue process with remaining cake pops.
Decorating Cake Pops
- Use a piping bag or cocktail stick add some melted chocolate to the bunny ears and dust with pink sanding sugar.
- Next, add some feet to the bottom of the cake pop with some melted chocolate and cover with more pink sanding sugar.
- With an edible ink marker draw some eyes on the cake pop.
- Add a dot of white chocolate to the pop where the nose will be with a cocktail stick.
- Using kitchen shears trim a piece of the pink marshmallow and attach it to the melted chocolate to form the bunny's nose.
- Draw the bunny's mouth with the edible marker.
- Finish the cake pop by adding a small amount of chocolate to the back lower section of the cake pop. Attach a white mini marshmallow to create a bunny tail. Add some texture to the tail by adding white chocolate to cover the marshmallow.
- Leave the cake pops to set on the foam block until ready to serve and enjoy
Notes
expert tips
- The success of your cake balls depends on the cake being evenly crumbled and mixed uniformly with icing. Adjust the mixture with more icing a little at a time if they are too dry. The mixture should hold together easily when formed into a ball.
- Thin candy melts with a little coconut oil if you notice they are lumpy or not smooth after melting.
- Use a deep microwave-safe container to dip pops. A mug or a glass is perfect!
- The edible market will run on the chocolate if it is not fully set. Pops can be set in the freezer for 5 to 10 minutes if desired before drawing the face on the bunny.
- These Easter Cake Pops will stay fresh in the refrigerator for 1 week covered in plastic wrap or 2 days at room temperature.
- Wrap treats in cellophane bags with curling ribbon for gifting or arrange them in cake pop bouquets with Easter egg cake pops for display!


Leslie says
Beautiful! Can't wait to see my kids faces when we make these! Thanks for the recipe and great tutorial.